Rapid Lumber Drying Techniques/A Guide to Efficient Wood Drying Methods
Rapid Lumber Drying Techniques/A Guide to Efficient Wood Drying Methods, The article presents effective techniques for quickly drying lumber in this comprehensive guide. Learn how to accelerate while maintaining quality. From air drying to diy wood kilns master the art of efficient lumber drying for your woodworking projects.
What are Rapid Lumber Drying Techniques/A Guide to Efficient Wood Drying Methods? Explore swift lumber drying methods with this detailed guide. Learn strategies like kiln drying, air drying, microwave, and solar drying for faster wood seasoning. Elevate your woodworking by mastering efficient diy kiln for wood while preserving quality and preventing defects.
Curing of wood is a crucial step in woodworking, as it ensures that the wood is stable and suitable for various projects. While air-drying lumber is the most common method, it can be time-consuming. In this guide, we’ll explore four effective ways to dry lumber fast while maintaining its quality and integrity. Whether you’re a beginner or an experienced woodworker, these techniques will help you achieve dry wood quickly for your woodworking projects.
This diy wood drying kiln is gold. The rapid drying techniques are outstanding. My projects now progress faster without compromising quality. My projects are now on a faster track to completion. Rapid Lumber Drying Techniques/A Guide to Efficient Wood Drying Methods/An Overview
Rapid Lumber Drying Techniques/A Guide to Efficient Wood Drying Methods/An Overview
The Basics Of Drying Lumber
Using wet or green wood in your woodworking projects can lead to issues such as warping, cracking, and joint instability. Dry wood, on the other hand, is more stable and less likely to experience these problems. How long does it take to kiln dry wood? Kiln drying wood typically takes several weeks to several months.
Drying Defects
Improper drying can result in defects such as cupping, twisting, and checking. To prevent these issues, it’s essential to follow proper drying techniques.
1. Air-Drying Lumber
The Traditional Approach
Air dry lumber involves stacking and spacing wood pieces in a well-ventilated area. Here’s how you can do it.
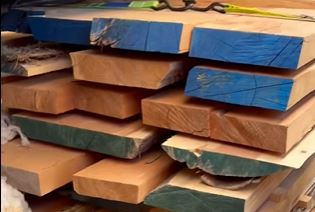
- Stacking The Wood
- Arrange the wood pieces in a neat stack, ensuring that there’s enough space between each piece for air circulation.
- Air Circulation
- Place stickers (thin strips of wood) between each layer of wood to create gaps that allow air to flow through.
- Cover The Stack
- Protect the stack from rain and direct sunlight using a tarp or roofing.
- Patience
- Air-drying takes time, and the drying time varies depending on factors like wood species, thickness, and local climate.
2. Kiln Drying
Professional And Controlled Drying
Kiln drying is a controlled process that uses heat and humidity to accelerate the drying process. While this method requires specialized equipment, it’s efficient and yields predictable results:
- Kiln Drying
- Place the wood in a kiln, which is a chamber equipped with heat sources and humidity controls.
- Controlled Conditions
- The kiln is set to specific temperature and humidity levels that gradually reduce the moisture content of the wood.
- Quicker Drying
- Kiln drying can significantly reduce drying time compared to air-drying.
3. Oven Drying
Quick Drying For Small Projects
Oven drying is suitable for small pieces of homemade wood kiln and can be done at home.
- Prepare The Wood
- Cut the into smaller pieces to ensure even drying.
- Use An Oven
- Preheat your kitchen oven to a low temperature (around 200°F or 93°C).
- Place The Wood
- Arrange the wood pieces on an oven rack, ensuring they’re not touching.
- Monitor The Process
- Keep a close eye on the wood to prevent over-drying or scorching.
4. Using A Dehumidifier
Efficient Indoor Drying
If you want to how to make a wood kiln, a dehumidifier can help control the humidity and speed up the process:
- Prepare The Wood
- Cut the wood into smaller pieces to ensure efficient drying.
- Set Up The Dehumidifier
- Place the wood pieces in a well-ventilated area and position the dehumidifier nearby.
- Control Humidity
- Set the dehumidifier to maintain the desired humidity level (around 25-35%).
- Monitor Progress
- Regularly check the moisture content of the wood using a wood moisture meter.
Conclusion
To sum up, Rapid Lumber Drying Techniques/A Guide to Efficient Wood Drying Methods. Drying wood quickly is possible through various methods, each with its advantages and considerations. While air-drying remains a reliable option, kiln drying, oven drying, and using a dehumidifier offer faster alternatives. Choosing the right method depends on your project’s requirements, available resources, and the type of wood you’re working with.
Remember that even with fast drying methods, it’s essential to monitor the wood’s moisture content and allow it to acclimate to the surrounding environment before using it in your woodworking projects. With the correct drying approach, you’ll be able to work with dry wood that’s stable, reliable, and ready for your next woodworking masterpiece.
Frequently Asked Questions
Q. Are rapid lumber drying techniques suitable for all types of wood?
A. While these techniques can work for various wood types, certain hardwoods might require more delicate approaches. It’s essential to understand the characteristics of the wood you’re drying and choose the appropriate method accordingly.
Q. How does kiln drying differ from other rapid wood drying methods?
A. Kiln drying involves using controlled heat and airflow to accelerate moisture removal. It offers precise control over drying conditions, making it faster and more predictable than methods like air or solar drying.
Q. Are there any risks associated with rapid wood drying?
A. Rapid drying can lead to cracking, warping, or loss of color if not done correctly. Monitoring moisture levels and adjusting drying conditions as needed helps mitigate these risks, ensuring quality while speeding up the process.