Easy DIY Corner Clamps To Build Cabinets/ Free Plans
The article,Easy DIY Corner Clamps To Build Cabinets/ Free Plans offers Simplify cabinet building with these DIY corner clamps. Access free plans to create your own corner clamps, streamlining the process and ensuring accurate and secure cabinet assembly.
How to Make Easy DIY Corner Clamps To Build Cabinets/ Free Plans? Crafting DIY corner clamps for woodworking is a breeze with provided free plans. Follow step-by-step instructions to create these essential tools, simplifying cabinet building and ensuring precise and secure assembly.
When it comes to woodworking and building cabinets, having the right tools and jigs can make a world of difference. One essential tool that can greatly simplify your woodworking projects is a corner clamp. Wood corner clamps ensure that your joints are perfectly square and secure, allowing you to create strong and precise connections between wood pieces. In this guide, we’ll show you how to make simple yet effective DIY corner clamps for your workshop, and we’re even providing free plans to help you get started.
I tried! building cabinets is now easy! These DIY corner clamps are really amazing With the added bonus of free plans guiding you step by step, they’re essential for anyone working on cabinet projects. These woodworking corner clamps streamline cabinet assembly. Free plans are a boon, making it accessible.
Easy DIY Corner Clamps To Build Cabinets/ Free Plans/Side-By-Side Process
Step 1
Gather Your Materials And Tools
- Saw (miter saw or handsaw)
- Drill
- Drill press (optional but recommended)
- Clamps
- Sandpaper
Materials Required
- Plywood or hardwood (for making the corner clamps)
- Screws
- Wood glue
- Clamping squares (optional but recommended)
- Corner clamp plans (downloadable for free)
Step 2
Cut And Prepare The Clamps
- Cut The Clamps
- Use your saw to cut the plywood or hardwood into strips. The width and length of the strips can be adjusted based on the size of the corner clamps you want to create.
- Drill Holes
- Drill holes in the center of each strip. These holes will serve as the pivot points for the corner clamps.
Step 3
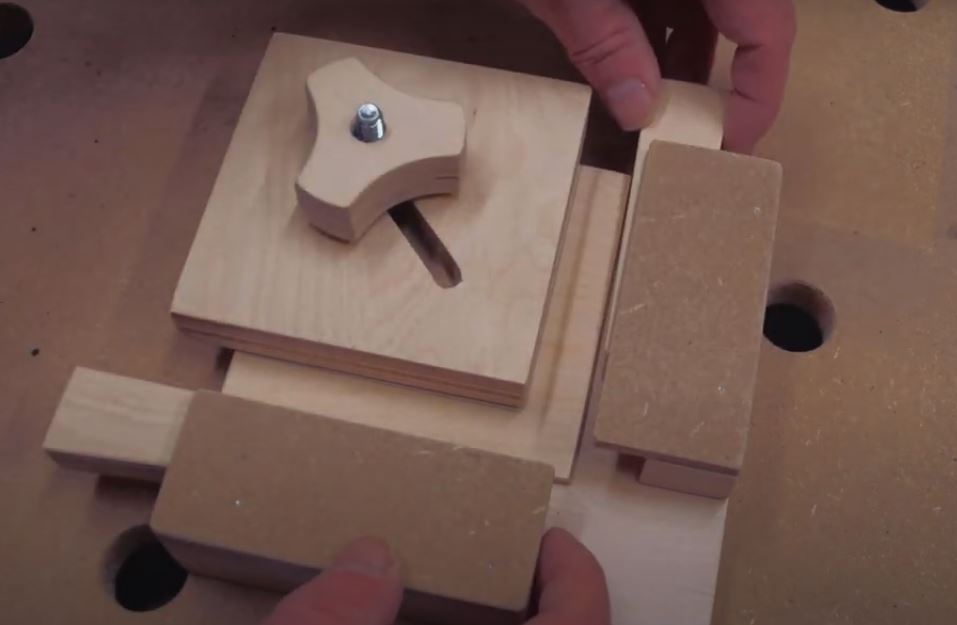
Assemble The Corner Clamps
- Assemble The Clamps
- Align the strips at a 90-degree angle to create an L-shaped clamp. Make sure the holes you drilled in the previous step align perfectly.
- Secure With Screws
- Use screws to attach the two strips together at the corner. This will create a sturdy L-shaped corner clamp.
Step 4
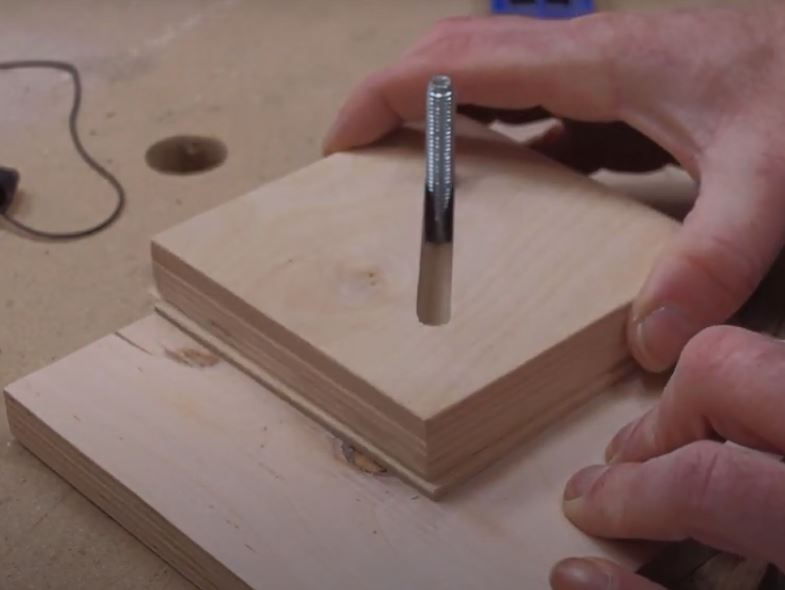
Add the Clamping Mechanism
- Attach The Mechanism
- Depending on the design of your corner clamp plans, attach the clamping mechanism to the open end of the L-shaped clamp. This mechanism could be a threaded rod, a handle, or any other clamping device that allows you to tighten the clamp securely.
- Test The Clamps
- Before moving forward, test your newly created DIY corner clamps to ensure they hold wood pieces securely at a 90-degree angle.
Step 5
Sand And Finish
- Smooth The Surfaces
- Sand the surfaces of your DIY corner clamps to remove any rough edges or splinters. This will ensure that your clamps won’t damage the wood you’re working with.
- Apply Finish
- If desired, apply a finish to your corner clamps woodworking to protect the wood and enhance their appearance. You can use paint, stain, or a clear finish, depending on your preference.
Step 6
Put The Corner Clamps To Use
- Position Your Workpieces
- Place the two wood pieces you want to join at a clamp wood 90 degrees. The corner clamps will hold them securely in place.
- Attach the Clamps
- How to use corner clamps, Place the corner clamps over the corners of the workpieces, ensuring that they’re aligned perfectly.
- Tighten the Clamps
- Use the clamping mechanism to tighten the corner clamps, securing the workpieces together. You’ll now have a strong and precise joint.
Final Thoughts
To sum up, Easy DIY Corner Clamps To Build Cabinets/ Free Plans, Creating your own DIY corner clamps is a practical and cost-effective solution for woodworking projects, especially when building cabinets or working on projects that require precise right-angle connections. With the free downloadable plans and a few basic tools, you can make sturdy and reliable corner clamps that will serve you well in your woodworking endeavors.
By following these simple steps, you’ll be able to ensure that your joints are perfectly square and secure, leading to professional-looking and structurally sound results. Whether you’re a beginner or an experienced woodworker, having a set of DIY corner clamps in your workshop will undoubtedly enhance your woodworking capabilities.
Frequently Asked Questions
Q. How do these DIY corner clamps simplify cabinet construction?
A. These corner clamps help hold cabinet pieces together securely, ensuring accurate alignment during assembly, which is crucial for a successful cabinet-building project.
Q. Are the free plans beginner-friendly and easy to follow?
A. Yes, the provided free plans are designed to be beginner-friendly, offering clear instructions and step-by-step guidance to create the corner clamps with ease.
Q. Can these corner clamps be used for other woodworking projects beyond cabinets?
A. Absolutely. While designed for cabinets, these corner clamps can also be handy for various woodworking projects where precise alignment and secure attachment are necessary, making them versatile tools.